Windows 11 offers several ways to capture screenshots and videos of your favorite games. Whether you want to capture an epic gaming moment, share a tutorial, or just show off your skills, Windows 11 makes it easy to do so. In this article, I’ll walk you through the steps to take a screenshot or record a video while playing games on Windows 11.
Taking a Screenshot on Windows 11
One of the simplest ways to take a screenshot on Windows 11 is by using the built-in tools. Here’s how you can capture your game screen quickly.

Using the Print Screen Key
The easiest method is to use the “Print Screen” (PrtScn) key on your keyboard. This key captures the entire screen, including the game you’re playing.
- Press the PrtScn key. This will copy the entire screen to your clipboard.
- Open an image editing program like Paint or any other editor you prefer.
- Paste the screenshot by pressing Ctrl + V.
- Save the image to your desired location.
This method is fast, but it requires an additional step to save the image. If you prefer something more streamlined, Windows 11 has you covered.
Using the Windows + Print Screen Shortcut
To save a screenshot directly to a folder without needing to paste it into an editor, you can use the Windows + Print Screen shortcut:
- Press Windows + PrtScn. The screen will dim briefly to indicate that the screenshot has been captured.
- Go to the Screenshots folder located in Pictures. Here, you’ll find your screenshot saved automatically.
This method is particularly useful when you need to take multiple screenshots quickly while gaming.
Using the Snipping Tool
Windows 11 also features the Snipping Tool, which allows you to take more customized screenshots:
- Press Windows + Shift + S. The screen will dim, and a small toolbar will appear at the top.
- Choose the type of screenshot you want: rectangular, freeform, window, or full-screen.
- The selected area will be copied to the clipboard.
- Paste it into an editor, or click on the notification that appears to save or edit the image directly.
The Snipping Tool is perfect for when you need to capture a specific part of your game, such as a scoreboard or a particular in-game item.
Recording a Video of Your Gameplay
Capturing a video of your gameplay on Windows 11 is just as straightforward. You can use the Xbox Game Bar, which is a built-in feature designed for gamers. Here’s how to record your game:
Using the Xbox Game Bar
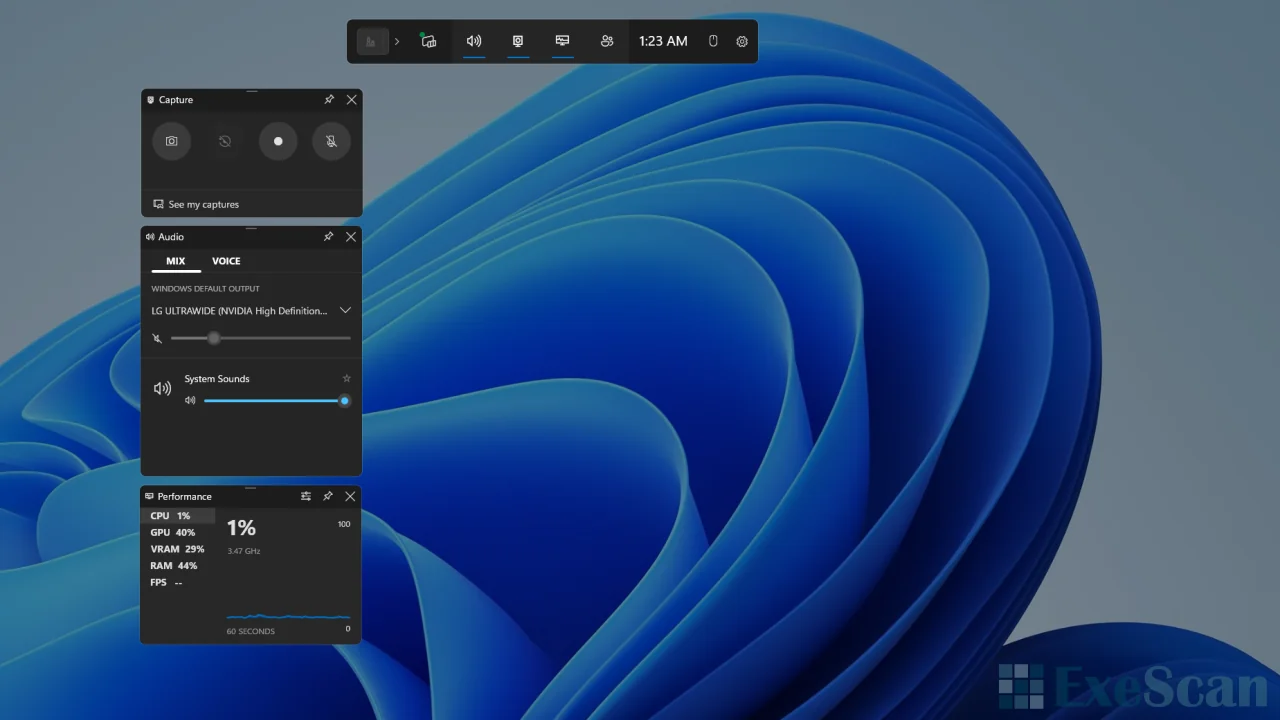
The Xbox Game Bar is a powerful tool for capturing video while gaming on Windows 11. It allows you to record your screen, take screenshots, and even stream your gameplay.
- Press Windows + G to open the Xbox Game Bar.
- In the Game Bar, click on the Capture widget, which looks like a camera icon.
- To start recording, click the Record button (the circle icon) or press Windows + Alt + R. The recording will start, and you can see a small overlay showing the recording status.
- To stop recording, press Windows + Alt + R again or click the Stop button in the overlay.
- The recorded video will be saved in the Captures folder within your Videos directory.
The Xbox Game Bar is great because it doesn’t require additional software and is already optimized for gaming on Windows 11.
Setting Up the Xbox Game Bar
Before recording, you might want to tweak some settings to ensure the best quality. To do this:
- Open the Xbox Game Bar by pressing Windows + G.
- Click on the Settings icon (a gear).
- Navigate to the Capturing tab, where you can adjust the video quality, frame rate, and audio settings.
By customizing these settings, you can ensure that your gameplay videos are of the highest quality possible.
Using Third-Party Software
While the Xbox Game Bar is excellent for most gamers, some may want more advanced features. If you need more control over your recordings, you can use third-party software like OBS Studio or NVIDIA ShadowPlay. These programs offer more options for editing, streaming, and even recording in higher resolutions.
OBS Studio, for example, allows you to set up multiple scenes, include overlays, and record in various formats. NVIDIA ShadowPlay, on the other hand, is perfect for those with NVIDIA graphics cards, offering seamless integration and high-quality video capture.
Conclusion
Taking screenshots and recording videos of your gameplay on Windows 11 is easy, thanks to the variety of tools available. Whether you’re using the built-in shortcuts, the Snipping Tool, or the Xbox Game Bar, Windows 11 ensures that you never miss a moment worth capturing. And if you need more advanced features, third-party software can provide additional functionality.
By following the steps outlined above, you can effortlessly capture your gaming experiences, allowing you to share your greatest moments or create content for others to enjoy. With Windows 11, every screenshot and video is just a few clicks away.